Golf Course Overview
Where Great Golf Meets Great Design
Championship Golf Course
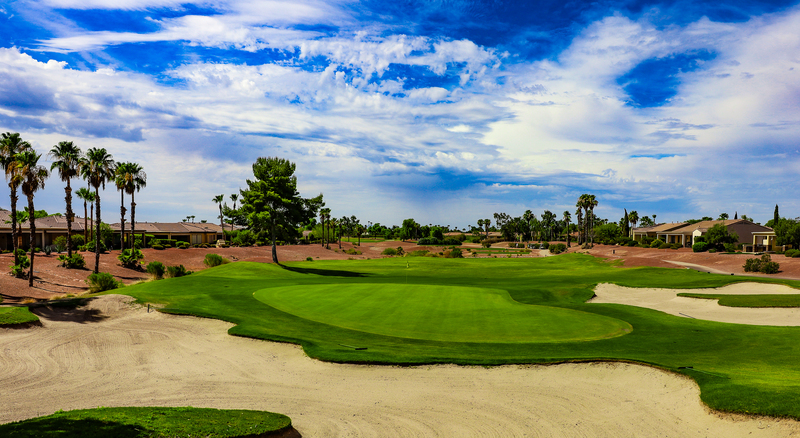
Corte Bella’s 18-hole championship course, designed by Greg Nash, delivers a true resort-style golf experience. Featuring wide, forgiving fairways, expansive undulating greens, and strategically placed bunkers, the layout offers both beauty and a challenge.
Each hole presents multiple ways to play, making every round engaging, rewarding, and perfectly suited for golfers of all skill levels.
Driving Range
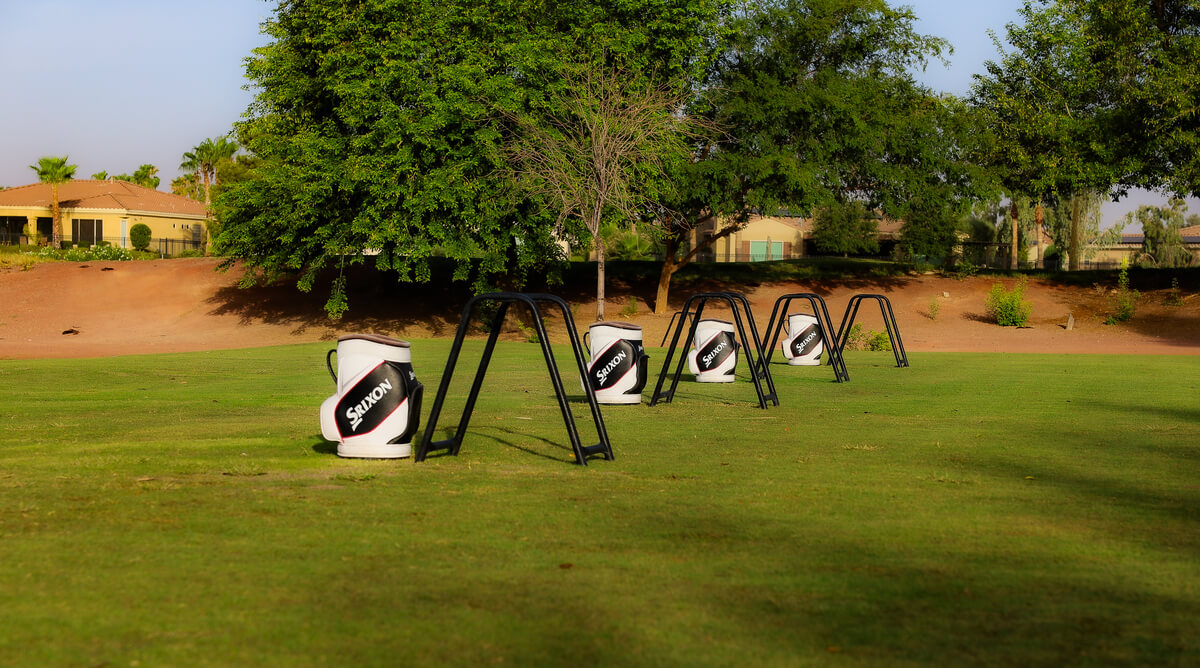
Corte Bella features an extremely versatile driving range designed to accommodate up to 24 golfers at a time. The double-sided layout includes teeing areas on both the north and south sides, allowing for year-round flexibility and optimal practice conditions.
Access to the north-side tee line is reserved exclusively for golf members.
Short Game
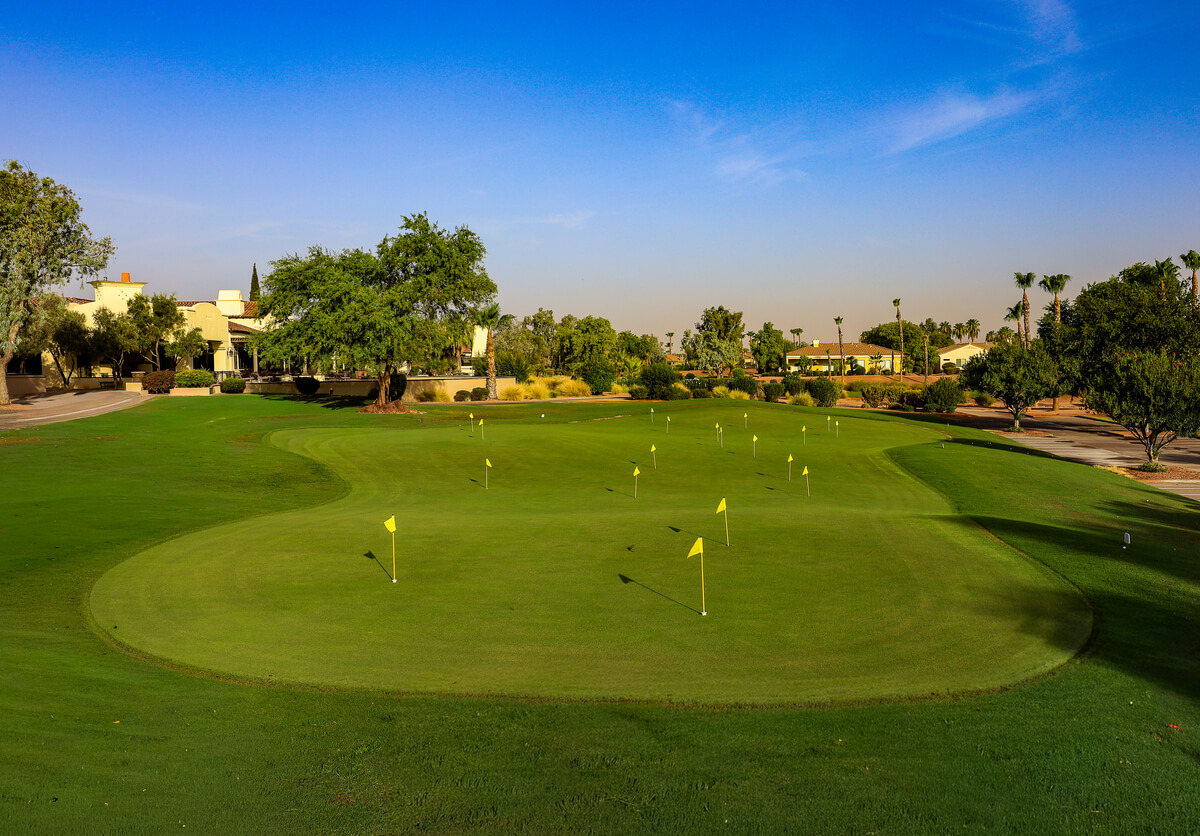
Complementing the driving range is an expansive short game area located on the property. The main putting green offers more than 12,000 square feet of pristine putting surface, ideal for refining speed and touch.
The practice experience is further enhanced with unlimited range balls, a dedicated chipping area, and a fully equipped practice bunker, giving members everything they need to sharpen every aspect of their game.
Private Golf Instruction
Across from the main driving range, a dedicated private lesson tee provides the perfect setting for personalized instruction. With experienced teaching professionals on staff, Corte Bella offers expert guidance designed to help golfers improve quickly and confidently.
From fundamentals to fine-tuning, you’ll see results from your very first session.
Course Overview & Golf Experience

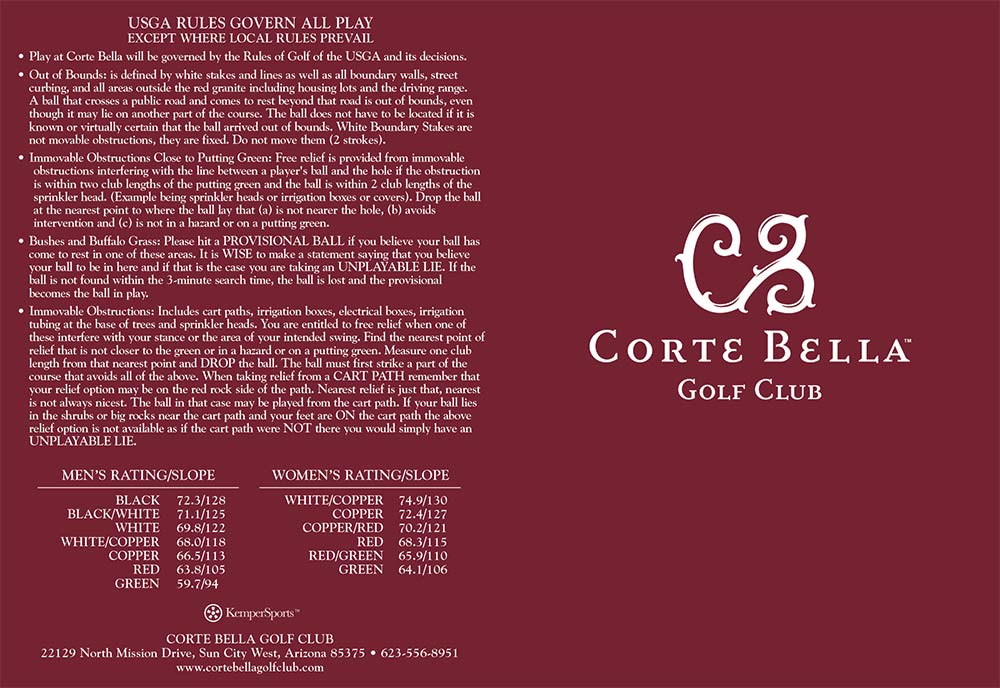
| MEN'S RATING / SLOPE | WOMEN'S RATING / SLOPE | ||
|---|---|---|---|
| BLACK | 72.3 / 128 | WHITE / COPPER | 74.9 / 130 |
| BLACK / WHITE | 71.1 / 125 | COPPER | 72.4 / 127 |
| WHITE | 69.8 / 122 | COPPER / RED | 70.2 / 121 |
| WHITE / COPPER | 68.0 / 118 | RED | 68.3 / 115 |
| COPPER | 66.5 / 113 | RED/GREEN | 65.9/110 |
| RED | 63.8 / 105 | GREEN | 64.1 / 106 |
| GREEN | 59.7 / 94 | ||
Hole 1
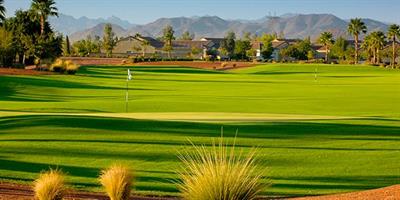
Par 4
Handicap (M/L): 17/13
| Tee | Yards | |
|---|---|---|
| Black | 357 | 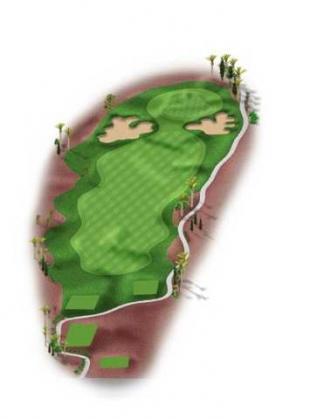 |
| Black/White | 357 | |
| White | 314 | |
| White/Copper | 314 | |
| Copper | 269 | |
| Copper/Red | 269 | |
| Red | 250 | |
| Red/Green | 250 | |
| Green | 200 |
Features
Corte Bella welcomes you with a generous fairway, so a well-placed tee shot isn’t the challenge here.
An accurate approach to the well-guarded green is where the difficulty lies.
Hole 2
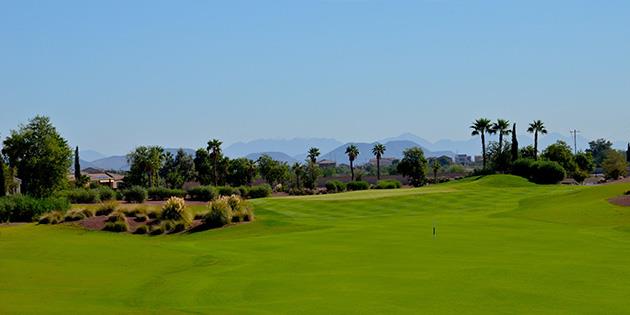
Par 4
Handicap (M/L): 3/5
| Tee | Yards | |
|---|---|---|
| Black | 448 | 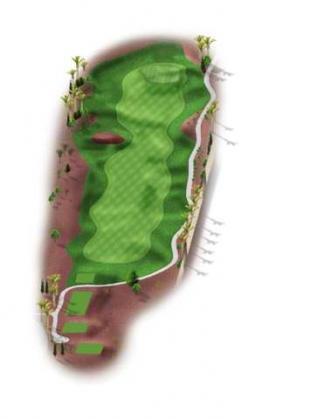 |
| Black/White | 409 | |
| White | 409 | |
| White/Copper | 370 | |
| Copper | 370 | |
| Copper/Red | 329 | |
| Red | 329 | |
| Red/Green | 270 | |
| Green | 270 |
Features
A wide fairway leads to a second shot to an elevated green.
Green complex has many elevations so for a chance at birdie, you need to be on correct level.
Hole 3
Par 4
Handicap (M/L): 5/9
| Tee | Yards | |
|---|---|---|
| Black | 412 | 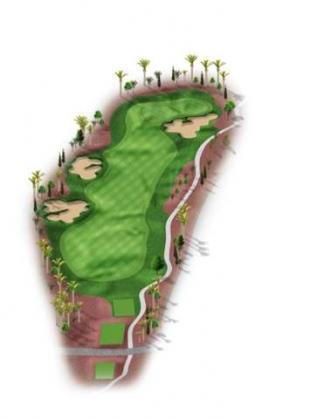 |
| Black/White | 390 | |
| White | 390 | |
| White/Copper | 342 | |
| Copper | 342 | |
| Copper/Red | 303 | |
| Red | 303 | |
| Red/Green | 245 | |
| Green | 245 |
Features
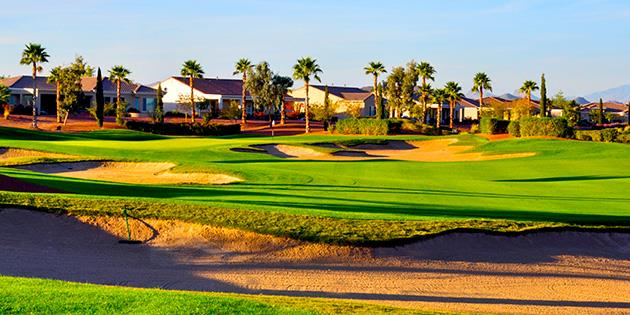
A slight dogleg right.
Make sure you use enough club as the green runs away on the right side behind the bunker.
Hole 4
Par 3
Handicap (M/L): 15/17
| Tee | Yards | |
|---|---|---|
| Black | 199 | 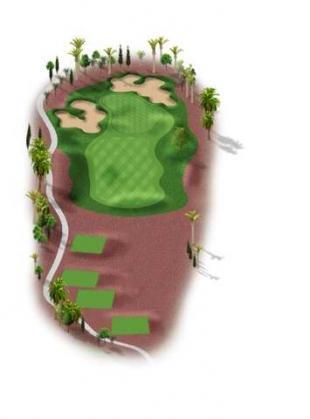 |
| Black/White | 199 | |
| White | 169 | |
| White/Copper | 169 | |
| Copper | 152 | |
| Copper/Red | 152 | |
| Red | 120 | |
| Red/Green | 120 | |
| Green | 120 |
Features
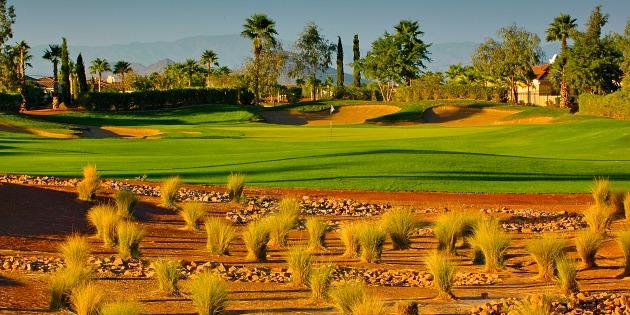
The green slopes from back to front so better to be short of the hole for an easier putt.
Hole 5

Par 5
Handicap (M/L): 11/3
| Tee | Yards | |
|---|---|---|
| Black | 546 | 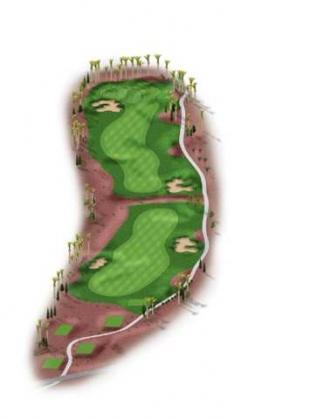 |
| Black/White | 546 | |
| White | 507 | |
| White/Copper | 476 | |
| Copper | 476 | |
| Copper/Red | 428 | |
| Red | 428 | |
| Red/Green | 330 | |
| Green | 330 |
Features
A three shot par 5 with a two level green.
Make sure that you are on the correct side of the fairway for the green approach to have the easier shot.
Hole 6

Par 4
Handicap (M/L): 7/11
| Tee | Yards | |
|---|---|---|
| Black | 375 |  |
| Black/White | 357 | |
| White | 348 | |
| White/Copper | 348 | |
| Copper | 330 | |
| Copper/Red | 330 | |
| Red | 286 | |
| Red/Green | 286 | |
| Green | 225 |
Features
The fairway runs off into the red rock areas on both sides making it imperative that the tee shot is in the fairway.
Hole 7

Par 4
Handicap (M/L): 1/1
| Tee | Yards | |
|---|---|---|
| Black | 474 |  |
| Black/White | 448 | |
| White | 448 | |
| White/Copper | 401 | |
| Copper | 401 | |
| Copper/Red | 354 | |
| Red | 354 | |
| Red/Green | 255 | |
| Green | 255 |
Features
Most difficult hole on the front nine. The more you can cut the corner without going into the fairway bunker the shorter the second shot will be in the severely sloping green.
Hole 8
Par 3
Handicap (M/L): 13/15
| Tee | Yards | |
|---|---|---|
| Black | 204 | 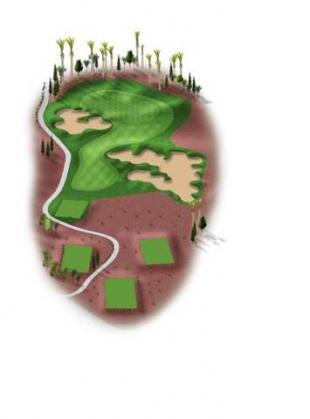 |
| Black/White | 184 | |
| White | 184 | |
| White/Copper | 148 | |
| Copper | 148 | |
| Copper/Red | 108 | |
| Red | 108 | |
| Red/Green | 108 | |
| Green | 108 |
Features
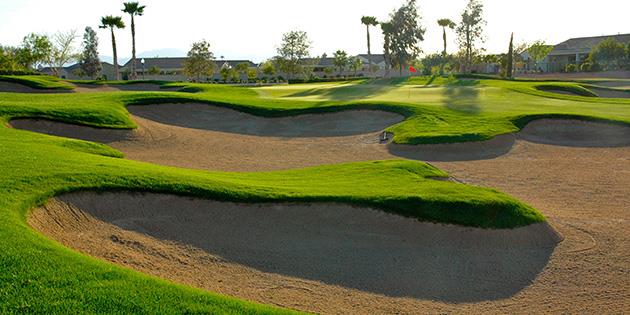
A very wide green that runs from left to right. Be careful when putting downhill as green is faster than it appears.
Hole 9
Par 5
Handicap (M/L): 9/7
| Tee | Yards | |
|---|---|---|
| Black | 539 | 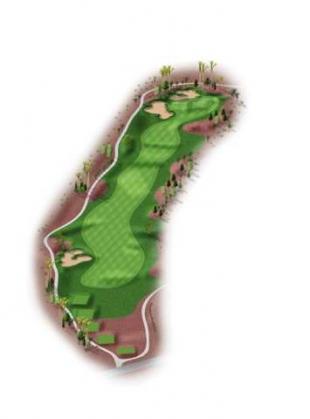 |
| Black/White | 539 | |
| White | 505 | |
| White/Copper | 505 | |
| Copper | 455 | |
| Copper/Red | 428 | |
| Red | 428 | |
| Red/Green | 428 | |
| Green | 380 |
Features
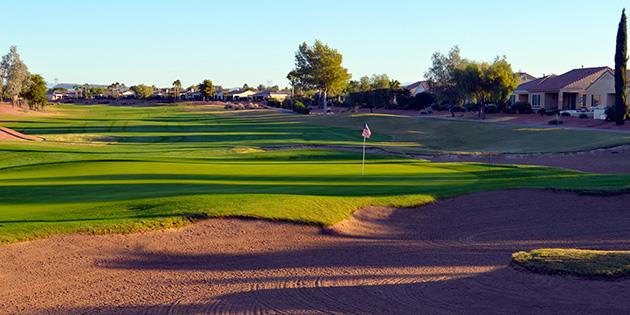
A three shot par 5 that also has a wide green complex. Make sure you are below the hole as the green slopes severely from back to front.
Hole 10

Par 4
Handicap (M/L): 12/16
| Tee | Yards | |
|---|---|---|
| Black | 393 | 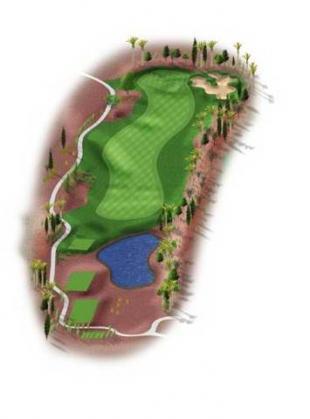 |
| Black/White | 393 | |
| White | 359 | |
| White/Copper | 359 | |
| Copper | 304 | |
| Copper/Red | 304 | |
| Red | 249 | |
| Red/Green | 249 | |
| Green | 220 |
Features
A short par 4 with a great chance for birdie.
Hole 11

Par 4
Handicap (M/L): 14/12
| Tee | Yards | |
|---|---|---|
| Black | 384 | 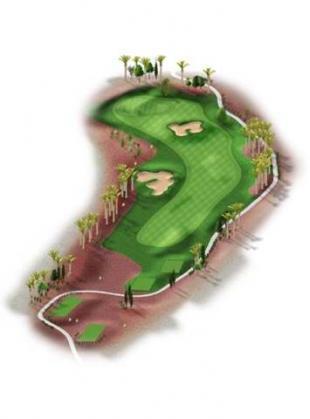 |
| Black/White | 384 | |
| White | 348 | |
| White/Copper | 348 | |
| Copper | 292 | |
| Copper/Red | 292 | |
| Red | 262 | |
| Red/Green | 262 | |
| Green | 225 |
Features
A dogleg left par 4. Keep the tee shot to the right of the fairway bunker. Blind second shot to green that has two levels with higher level on the right side.
Hole 12
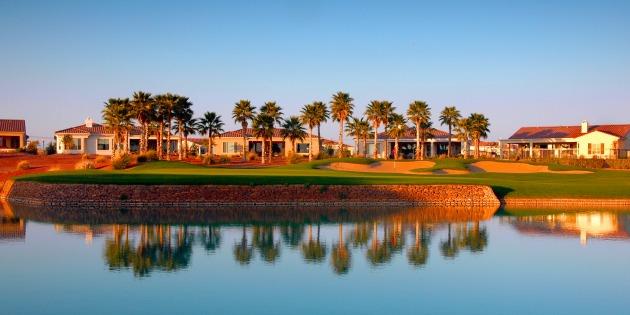
Par 3
Handicap (M/L): 16/18
| Tee | Yards | |
|---|---|---|
| Black | 157 |  |
| Black/White | 157 | |
| White | 128 | |
| White/Copper | 128 | |
| Copper | 106 | |
| Copper/Red | 106 | |
| Red | 83 | |
| Red/Green | 83 | |
| Green | 83 |
Features
Picture Par 3 to green surrounded by water on the front and left side. The back of the green is framed by an abundance of palm trees.
Hole 13
Par 5
Handicap (M/L): 2/2
| Tee | Yards | |
|---|---|---|
| Black | 607 |  |
| Black/White | 568 | |
| White | 568 | |
| White/Copper | 513 | |
| Copper | 513 | |
| Copper/Red | 480 | |
| Red | 480 | |
| Red/Green | 350 | |
| Green | 350 |
Features
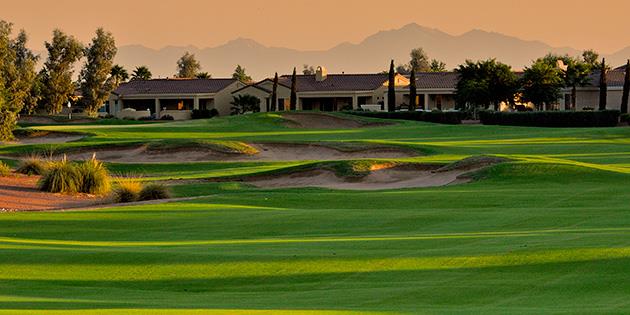
Long par 5 requires 3 good shots to the multi-tiered green. The fairway has several bunkers waiting to catch all shots. The green runs away from the player severely starting in the middle of the green.
Hole 14
Par 4
Handicap (M/L): 6/8
| Tee | Yards | |
|---|---|---|
| Black | 367 | 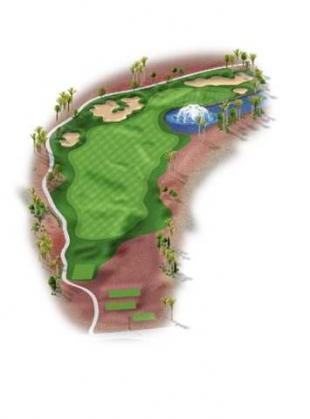 |
| Black/White | 367 | |
| White | 342 | |
| White/Copper | 342 | |
| Copper | 323 | |
| Copper/Red | 288 | |
| Red | 288 | |
| Red/Green | 288 | |
| Green | 230 |
Features
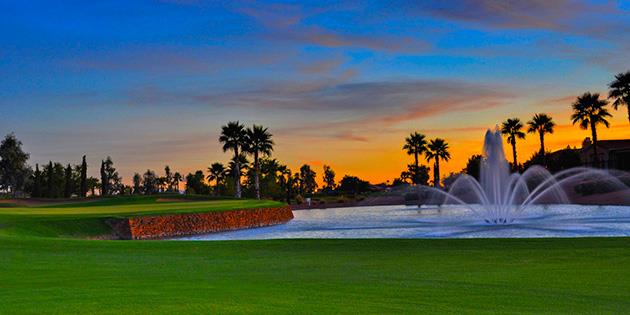
This hole has a beautiful fountain situated in the middle of a lake that fronts the green on this picturesque par 4.
Hole 15
Par 3
Handicap (M/L): 18/14
| Tee | Yards | |
|---|---|---|
| Black | 167 |  |
| Black/White | 167 | |
| White | 133 | |
| White/Copper | 133 | |
| Copper | 119 | |
| Copper/Red | 119 | |
| Red | 96 | |
| Red/Green | 96 | |
| Green | 96 |
Features
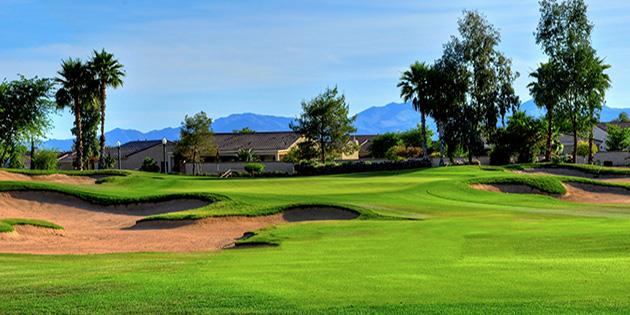
A short uphill par 3 that plays a little longer than the yardage. The green has about 4 different levels, so make sure you are on the correct level.
Hole 16
Par 4
Handicap (M/L): 4/4
| Tee | Yards | |
|---|---|---|
| Black | 400 | 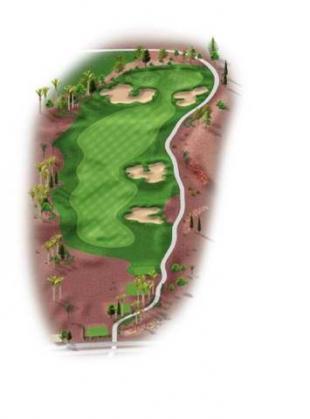 |
| Black/White | 358 | |
| White | 358 | |
| White/Copper | 328 | |
| Copper | 228 | |
| Copper/Red | 300 | |
| Red | 300 | |
| Red/Green | 255 | |
| Green | 255 |
Features
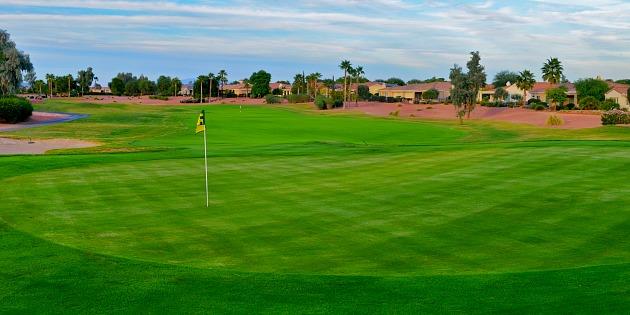
A slight dogleg right par 4. Make sure that the tee shot is kept out of the bunkers on the right. The second shot plays into a prevailing wind so make sure enough club is used to carry the bunkers guarding the front of the green.
Hole 17
Par 5
Handicap (M/L): 8/6
| Tee | Yards | |
|---|---|---|
| Black | 571 | 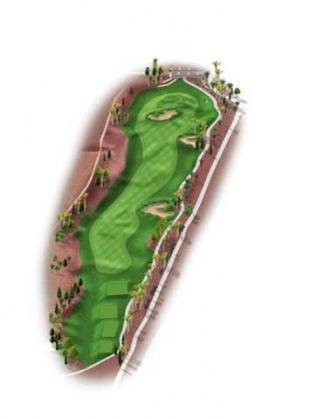 |
| Black/White | 531 | |
| White | 531 | |
| White/Copper | 483 | |
| Copper | 483 | |
| Copper/Red | 434 | |
| Red | 434 | |
| Red/Green | 360 | |
| Green | 360 |
Features
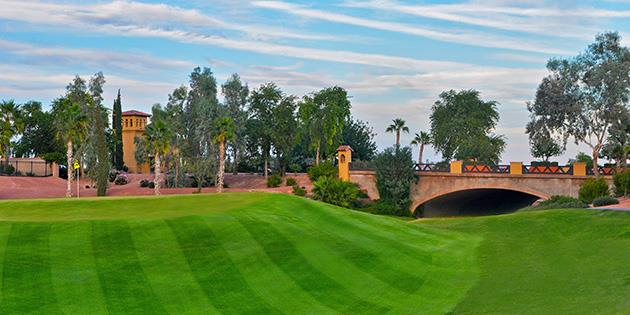
Bring out the driver and let ‘er rip on this wide open par 5, which has a generous landing area. Big hitters with ambitions of reaching in two have to tackle a green fronted by a steep faced bunker.
Hole 18

Par 4
Handicap (M/L): 10/10
| Tee | Yards | |
|---|---|---|
| Black | 411 |  |
| Black/White | 392 | |
| White | 392 | |
| White/Copper | 336 | |
| Copper | 366 | |
| Copper/Red | 336 | |
| Red | 297 | |
| Red/Green | 250 | |
| Green | 250 |
Features
The finishing hole is a slight dogleg to the left created by the bunker complexes that surround the landing area. The shot into the elevated green requires an accurate shot otherwise the ball will roll off the green. The green complex not unlike many on the course has several levels.
Scorecard